A motorcycle gas tank is typically wet due to the fuel that runs inside of it; as a result, if cleaning is not taken, it is vulnerable to rust.
A gas tank that has been neglected for a long time and developed rust will only cost you money. You are compelled to keep replacing fuel filters as a motorcycle’s gas tank begins to deteriorate from the inside out.
However, if you took the time to occasionally clean the gas tank on your motorcycle, you would actually save money rather than incur a loss.
As part of thoroughly cleaning a motorcycle, one process involves cleaning the gas tank. To make sure you don’t damage the tank, there is a proper procedure you should adhere to.
But don’t worry; we will show you the correct procedures to take.
Ten Steps Of Cleaning A Motorcycle Gas Tank
By cleaning a motorcycle’s gas tank properly, you can prolong the tank’s lifespan and prevent it from being destroyed. Here are some procedures for cleaning a motorcycle gas tank:
Step1: Gathering Necessary Equipment
You need a few pieces of equipment in one location that will make cleaning the gas tank easier for you at each step if you have them all together. Below are the available tools:
- Screwdriver;
- Water;
- Soaker hose;
- Patrol or often;
- Vinegar;
- Baking Soda.
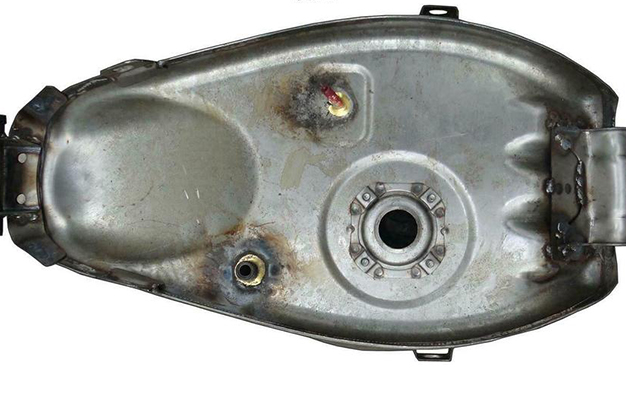
Step2: Removing The Gas Tank
When a gas tank is stuck on a motorcycle, it is impossible to clean it because it will interfere with your work and possibly cause you minor injuries. Therefore, to ensure safe cleaning, disassemble the motorcycle’s gas tank before beginning work.
The gas tank is secured with a few bolts and screws. You must use a screwdriver to pry them open before removing the tank. Need to take off the peacocks, hoses, and gas caps as well.
Step3: Blocking The Fuel Line
During the disconnection of the gas tank, the fuel line has also been naturally disconnected. But for added convenience, it needs to be turned off separately. What will happen if the fuel line is not sealed, you might be wondering. A patrol could arrive in this situation.
Additionally, if work is not done carefully, dirt and other foreign objects could enter the line and damage the engine. Before continuing to the next step, make sure the line is completely sealed.
Step4: Emptying The Tank
For the sake of convenience at work, the gas tank ought to be completely empty. Transfer any remaining fuel to a container that is secure for patrol if there is any. If the remaining fuel is not removed, you won’t be able to completely clean the tank. A suction hose can be used to remove extra fuel.
If the tank contains any other material, such as fuel, you may take a bucket. You will be able to identify which dirty gas accidentally entered the tank earlier when it has accumulated in the bucket.
Step5: Reviewing The Tank
You should thoroughly clean your tank right away. Check to see if the tank is still in tact and if there are any other issues at this point. This debris in the carburetor can enter the engine and seriously harm both the carburetor and the engine.
Not starting the engine, giving pick-up falls, having spark plugs that are quickly dirty, and having carburetor overflow, among other issues, will also shorten the life of the fuel tanker of the motorcycle. If there is such a serious issue, address it.
Step6: Spraying Water With Pressure
A motorcycle’s gas tank has a relatively large interior, so if you sprinkle water inside it normally, it won’t be much use. To guarantee that there is a steady flow of water inside each section of the tank, you must apply water at high pressure.
Any dirt that may have built up in the bottom or corners of the interior of the tank is forced to become loose by the high pressure water. If you apply some water and then look inside the tank to see if there is any dirt that cannot be removed with water. If there is, remove it with a small push from a thin, hard stick.
Step7: Draining The Water From The Tank
Shake the tank after applying pressured water to it for a while, then arrange to drain the water and dirt together. However, rust and other types of dirt may not be removed with just water if they are present inside. However, using water to clean will make your subsequent task simpler.
Close the mouth of the tank after adding the necessary amount of patrol or octane and the ball bearing, being careful not to spill any of the fuel on the outside. The dirt should then be tested after the tank has been vigorously shaken. This process makes it possible to remove rust along with the dirt present in the tank
Step8: Using Vinegar
If there is a substantial buildup of dirt, it may be challenging to clean the gas tank of dirt and rust using only water. In this instance, vinegar is a wise choice. Baking soda and vinegar can be combined to clean the tank without using chemicals.
When the bubbles start to appear, apply it. Lay down with water after observing the rusty mixed bubbles. Now, you can probably achieve your goals.
Step9: Reconnecting The Gas Tank
The motorcycle gas tank must be properly positioned after the cleaning process is complete. Although it’s almost the last step, you must complete it carefully because it is so important. Do you still have a count of the screws and bolts you removed?
Apply and tighten the screws; otherwise, they might suddenly come off as you’re riding a motorcycle and put you in an awkward situation. Additionally, there might be some unintended mishaps.
Step10: Adding Fuel To The Tank Again
It’s time to refuel your tank after you’ve completed the procedure if you’re confident that it’s in good shape and that a simple cleaning will suffice. Release the sealed fuel lines before adding fuel. Add a specific volume of fuel.
If the motorcycle doesn’t sound perfect, you should test it out by starting it up and listening to its sound. This will be exactly how the fuel tanker process is finished if everything goes according to plan.
Clean Your Motorcycle Gas Tank With These Tips:
You shouldn’t need any safety precautions to begin cleaning the gas tank even though you are accustomed to riding your motorcycle. However, you must take the following safety precautions when cleaning the gas tank:
Tip1: By being careless when cleaning the tank, you might accidentally sprinkle fuel or get rust in your eyes. Take every precaution to keep your eyes covered.
Tip2: Work in a place where there is sufficient ventilation as a kind of condensed smoke is formed during tank cleaning, which is harmful to inhale
Tip3: To remove rust, you must combine several ingredients at once and pour them into the tank. Do not mix without a prescription, as harmful chemical reactions may happen
Tip4:You may need to use some combustible material but make sure that things that catch fire easily are kept away from it
Tip5:When working with tanks and fuel systems, save fuel properly which will be useful later
Tip6:They shouldn’t fall off heavily when using chemicals. Sprinkle with a hose so that it reaches all places
Tip7:Before spraying the chemical into the gas tank, seal all of the holes to prevent spills during shaking.
What Will Happen If You Don’t Clean A Motorcycle’s Gas Tank Regularly?
The motorcycle could be quickly destroyed if the gas tank is not cleaned in a timely manner. The following comments urge you to take care of it:
Obstruction Of Fuel Flow
Rust spreads throughout your gas tank when it is present in sufficient quantities. Additionally, until it is cleaned, the rust progresses day by day due to a fuel flow path that restricts proper fuel flow.
Your motorcycle only needs fuel to flow properly. You won’t be able to ride the motorcycle comfortably if its flow is restricted, and the engine will suffer.
Creates Pressure On The Fuel Line
The path of all the holes in the gas tank will also become clogged with dirt and rust if they are constantly accumulating inside the tank. Do you believe it is irrelevant? Pressure will build up in the gas tank due to obstructions in the fuel flow, which could have disastrous effects.
Continuous pressure on the tank will cause it to overheat, and if it is exposed to the environment, it may explode while the motorcycle is in motion, which is very dangerous for you.
Decrease The Bike Value
An essential component of a motorcycle, gas tanks ensure that your motorcycle can operate. Long-term rust or contamination of the gas tank can cause the tank to slowly deteriorate, lowering both its own value and the value of your bike.
The tank’s capacity also decreases, so if you plan to sell your motorcycle in the future, you’ll probably have to offer a lower price.
Additional Costs
Rust can progress to the point where the tank is no longer worth cleaning. What is the best method for changing a gas tank? Not frequently, as it is sufficiently expensive. To avoid a significant expense, it is preferable to clean it frequently.
Additionally, if your bike is an older model, it’s possible that you won’t be able to find the proper tank to replace it on the market. Additionally, you’ll be clearing out clutter you don’t need.
Conclusion
Keep in mind that even well-maintained motorcycles may have rust and debris inside their gas tanks. It is crucial to understand how to properly clean the gas tank for this reason. After cleaning the gas tank, you can assess whether the tank is in good enough condition to last for a while or if you need to replace it soon.
You won’t need to keep changing fuel filters or cleaning the carb when you clean the gas tank on your motorcycle. Without regular cleaning, a tank begins to deteriorate from the inside out.
Since there is no instruction manual for how to clean a gas tank, many people are apprehensive about the process. It’s not difficult, as you can see, though.