One of the first steps for a lot of new riders into proper motorcycle maintenance, along with changing their motorcycle’s oil, is learning how to clean and lubricate a motorcycle chain. Overall, it’s a fairly easy procedure that should only take a few minutes but will significantly increase the lifespan and functionality of both your motorcycle chain and sprockets.
This short, step-by-step tutorial will show you how to properly clean and lubricate a motorcycle chain. Check out our How to Clean and Lube Your Motorcycle Chain video for more information if you’re looking for more specifics. where Lemmy delves a little deeper into some of the specifics of motorcycle chain maintenance.
How Should You Clean Your Motorcycle Chain?
Step 1: Figure Out Your Chain Type
Your approach to cleaning the grime off will depend on the type of motorcycle chain you’re using.
Metal-on-metal links without an interlocking seal make up a basic motorcycle chain. In comparison to sealed motorcycle chains, plain chains can therefore be cleaned more vigorously. Sealed motorcycle chains (also known as: For the purpose of keeping grease inside the pin and bushing cavity (and keeping road grime outside), O-ring, X-ring, or Z-ring chains (use a rubber seal between the inner link and outer links. This design makes cleaning more delicately necessary and helps the chain last longer.
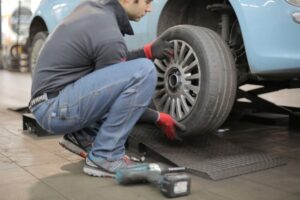
Step 2: Get Your Bike Into Position
A motorcycle chain can be cleaned and lubricated with relative ease. If you have a paddock stand or a center stand for your bike, it makes the process much simpler. Either choice enables the rear wheel to freely spin, allowing your motorcycle chain to be cleaned and lubricated more effectively.
Do not be concerned if you do not possess either of the aforementioned stands. You can navigate the driveway with a little help from your kickstand. Move the motorcycle after cleaning one area to gain access to the next. Taking the chain completely off and repairing it that way is an additional option.
Step 3: Examine The Motorcycle Chain And Sprockets
Cleaning your chain gives you a great opportunity to get close and examine it, which is a great way to assess how well it’s doing overall.
Examine the chain wear while you’re there. How much “wiggle room” from side to side does your chain allow? Under compression and tension, how much do the links budge? Minimum variations in each should be permitted by a motorcycle chain in good condition.
Then there is the conventional approach to figuring out when to replace your chain. You can find the maximum chain link length for a specific number of links in your shop manual. The chain is too worn if there are more links than that. Here is yet another quick method for conducting an unofficial check. Pull on a chain link at the backmost part of the rear wheel’s sprocket. The chain should hug the sprocket, but if it is severely worn, it will pull away from it.
Investigate the master link. The link that has been used to connect the two ends of a motorcycle chain is known as the master link and will appear slightly different from the links around it. This is a great chance to verify that the master link is securely fastened, whether it is done so using a clip or rivets that have been peened over.
Additionally, check your sprockets. Your sprockets will typically show wear in a couple of ways, depending on the state of your chain and the manner in which you ride. Look for “shark fins” and sharp teeth when inspecting for worn sprockets. “When the sprocket tooth’s leading edge wears more heavily than the back side, this condition is known as “shark fins.” This occurs when riding a bike that is frequently accelerated quickly and decelerated slowly (or when the chain is very old).
The teeth on your motorcycle sprocket should typically be flat at the tips. When they sharpen, it’s because of both shark fins and repeated hard braking and downshifting, which wear down the trailing edge of the sprocket tooth as well.
As a general rule, chains and sprockets should be replaced at the same time because it is ineffective to put a new chain on a damaged sprocket.
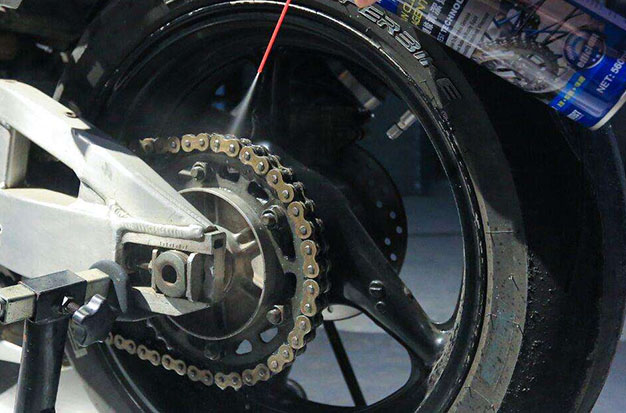
Step 4: Spray Chain With Chain Cleaner
It’s time to start removing the grime at this point. While you could choose a product like Maxima Clean Up Chain Cleaner, kerosene will also function just as well to remove the lubricant and dirt particles already present on the chain. Don’t be afraid to thoroughly wet things down as you make your way around the chain. New motorcycle chains are not inexpensive, but kerosene is. So, be open-minded when applying.
Step 5: Scrub The Chain
Use a motorcycle chain brush to get at the caked-on gunk after the chain has been thoroughly wet. Since it enables you to clean three of the four sides of your motorcycle chain simultaneously, something akin to “The Grunge Brush” has been a tried-and-true favorite for years. Be thorough; it will be beneficial in the long run. The motorcycle chain lube adheres more effectively to a clean surface.
Step 6: Re-spray The Motorcycle Chain
Re-soak the motorcycle chain in your preferred cleaning solution to complete the cleaning phase of the procedure. Make sure that all of the chain grime’s last traces have been blown away. Chains on motorcycles are destroyed by gunk. Do your best to get rid of it all.
Step 7: Dry The Motorcycle Chain
If applied to a dry surface, motorcycle chain lube will stick to the chain. Prior to lubricating, give the chain plenty of time to dry completely and to be completely free of chain cleaner. As things are probably getting a little gross by this point, you can also take advantage of this as an opportunity to clean up your workstation.
Step 8: Lubricate The Motorcycle Chain
Apply the lubricant evenly to all sides of the chain after making sure it is clean and dry. There are many options for the best chain lubricant, ranging from specialized products like Maxima Chain Wax to regular chainsaw bar oil. The benefit of using something like Maxima wax is that it is much less likely to fling off of the motorcycle chain and cause a mess on other parts of the bike.
There are a few distinctions between plain and sealed chains that you want to keep in mind when determining the best way to lubricate a motorcycle chain. Put some lube on plain chains and wipe off the extra. The best way to guarantee that a simple chain continues to operate correctly for many miles to come is to keep it continuously coated in clean lubricant. In contrast, grease found inside O-rings lubricates sealed chains, allowing you to use less chain lubricant because it only serves to prevent rust on the chain’s exterior.
Do I Need To Remove My Motorcycle Chain To Clean It?
Everyone has a slightly different opinion on whether the chain should be on or off the bike for a thorough cleaning, according to the how-tos and forums I read.
It used to be customary to remove a bike chain and shake it in a jar of degreaser, but this is less common nowadays. Our methods for cleaning have had to change because chains are getting more precise as more gears are added to modern drivetrains.
When 10-speed drivetrains were widely used, the chains were usually made to be installed just once, and then they were only meant to be taken off when they became worn out.
According to Calvin Jones of Park Tool, if the chain has a “connection rivet,” you open the door to the possibility of creating a weak link every time you remove and replace one. Even a master link is best left unattended.
Shimano and SRAM advise using a fresh joining link each time a chain is installed for those who have (officially) non-reusable links.
Despite brands’ insistence to the contrary, many riders successfully reuse these “snap-lock” links. A set of master link pliers is the ideal tool to force these free if you do decide to take the chance.
This may be subject to more discussion with regard to older drivetrains that use 7, 8, or 9 speeds (or those with reusable 10- or 11-speed links).
I Can Take Off My Chain; How Should I Clean It?
If you’re worried about dirt, this is the perfect tool to have. Ultrasonic cleaners can be purchased online for a reasonable price. David Rome / Immediate Media
If your chain has a reusable masterlink and you don’t need to use a chain-breaking tool, you’re in the minority. However, this means you can remove the chain and degrease it.
Jason Smith is in favor of removing the bike’s chains. “To properly clean the chain, we advise taking it off. Easy removal is made possible by a fast link like the Wippermann Connex Link. The chain can be cleaned most effectively by putting it in a straightforward, low-cost ultrasonic machine.
“Cleaning the internals of the links’ links is made very easy by the ultrasonic agitation. Smith advised that if an ultrasonic cleaner wasn’t available, the chain could be placed in a sealed container with cleaner and vigorously shaken.
Using Simple Green in conjunction with an ultrasonic cleaner, in our experience, has been successful in cleaning the chain and, most importantly, in removing the obstinate grit from the rollers. It takes several five-minute cycles (or longer) to thoroughly clean a filthy chain, though.
If you don’t have time for this, you can quickly have the chain back on the bike by scrubbing it down, which will achieve results similar to those of an ultrasonic cleaner.
With a stiff-bristled brush, scrub the chain to restore the exterior sparkle if you want to use the ultrasonic cleaner more quickly. Then, put the chain through the cleaner. After finishing, rinse it with water and use compressed air to air dry it. After that, your chain will truly sparkle and be brand new.
Avoid letting your chain soak for more than a few days, whatever you do. Degreasers have been implicated in some terrifying tales of metal corrosion and surface cracking.
What Is A Motorcycle Chain Cleaned In A Careless Manner?
Even if it turns into a grinding paste, Friction Facts testing has shown that lubricating a dirty chain will make it more effective than a dry dirty chain. David Rome / Immediate Media
If you don’t want to deal with the hassle of deep cleaning your chain, simply lubricating and wiping it with a clean, lint-free cloth on a regular basis will do.
Some lubes make the claim to be an all-in-one cleaner and lube, but we’ve found these to be too thin for proper lubrication during longer rides. In any case, wipe off any excess lube before riding as is the standard procedure.
It’s preferable to lubricate over a dirty chain than not to lubricate it at all, according to Smith, who supports this practice.
Changing out a filthy chain is the easiest way to clean it. Here, Jones gives the straightforward advice to measure chain wear before each cleaning because there is no point in wasting time on a worn chain.
Once a chain begins to show signs of wear, we remove the old cranks and cassette from the bike and thoroughly clean them in a parts washer. By doing this, a new chain gets a nice welcome.
Conclusion
You can lubricate the chain once it is clean, dry, and warm. Put the bike back on the stand and lightly spray the area where the chain and sprocket meet. Stop spraying after the chain has gone one full rotation. Spray the outer sideplates lightly for one rotation, then spray the inner sideplates for a second rotation. Applying too much lubricant will cause it to prematurely wear out and defeat the purpose of lubricating it in the first place because it will attract dirt and act as a grinding paste. The last task is to compare the chain’s tension to the manufacturer’s suggested settings.