How often do you believe a professional motorcycle brake fluid is changed? Every race is correct, as you indicated in your response. How frequently do you bleed and change your bike’s brake fluid? Even if you haven’t been riding it, if you haven’t serviced your brakes in the past year, you are way past due and should change them. Both recreational and racing riders should bleed their brakes after every 20 and 40 hours of riding, respectively.
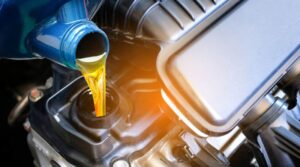
Because of water absorption, contamination, or overheating, brake fluid degrades over time. Similar to how gasoline darkens when it starts to go bad, fresh brake fluid is light in color. DOT 3, 4, or 5.1-grade brake fluid is typically used with off-road motorcycles. Use what your bike is designed for, but in general, the higher the number, the better the quality and the higher the boiling point (yes, brake fluid can boil under extreme conditions). It is best to use a fresh sealed bottle whenever you replace your brake fluid because brake fluid will absorb water molecules in the air after a bottle has been opened. Only keep an opened bottle for six months at the most.
When Should You Replace Your Brake Fluid?
Since when was your brake fluid last replaced? Most manufacturers advise replacing your brake fluid every two years in order to prevent unexpected brake failure. Unfortunately, very few riders actually heed this advice.
The risk of using old brake fluid is that you might not get enough notice that it needs to be changed. Due to its hygroscopic nature and glycol base, brake fluid can be affected by moisture, which lowers its boiling point and decreases its effectiveness in warm climates. Your brakes will start to feel squishy if there is too much moisture present, which will significantly lengthen the time it takes you to stop. That’s bad news for all riders. Schedule a brake fluid replacement every two years by using the steps below.
How Do You Change Brake Fluid?
Equipment You Need
Although those specialized tools are available, changing the brake fluid in your motorcycle doesn’t require any fancy tools or equipment, making it a DIY-friendly task. You’ll need your handy owner’s manual, a Phillips screwdriver, a box wrench, a clear piece of hose that will fit over the bleeder bolt (about a foot or two should be enough), a spill-proof container (a glass jar with a hole in the lid works well), shop rags, and brand-new, unopened brake fluid to get started. You can hasten the bleeding process by using a vacuum bleeder.
Instructions
Step One: To help stop debris from entering the brake system, clean the area around the master cylinder with a shop rag. Next, cover any finished bodywork and parts of your motorcycle that are close to the master cylinder with a fresh rag or towel. Because brake fluid is so corrosive, it can quickly tarnish your motorcycle’s finish.
Step Two: The master cylinder reservoir cap can be removed using a screwdriver. Then, carefully remove the backing plate and diaphragm. Put these components in a safe place and on a clean rag.
Step Three: The brake caliper’s bleeder bolt’s rubber cap should be removed. Next, wrap the bolt with the closed end of the wrench. With the wrench in position, connect the length of hose to the bleeder bolt and direct it into your draining container.
Step Four: By repeatedly pumping the brake lever, pressurize the braking system. Crack the bleeder bolt just enough to allow pressurized fluid to escape while the brake lever is still pulled in, until the lever comes back to just before touching the handlebar. After releasing the lever, tighten the bleeder bolt. Refill the reservoir with brand-new, unopened brake fluid to the top. Pump the brake lever until it becomes stiff once more to re-pressurize the system. When the fluid is clear and free of air bubbles, repeat the bleeding and filling procedure.
Step Five: Reinstall the reservoir cap, the diaphragm backing plate, and the diaphragm after topping off the brake fluid until the reservoir is full. Make sure no fluid is left on your motorcycle by wiping down the master cylinder and the area around the bleeder valve.
Notes
Use the brake fluid that is recommended for your motorcycle. Each kind is only suitable for specific applications and has a different range of boiling points. The majority of motorcycles use DOT 4 or DOT 5.1 brake fluid (DOT 5 is silicone-based and shouldn’t be used unless the owner’s manual specifically instructs you to do so). DOT 3 fluid is used in the majority of cars, but due to its lower boiling point, it cannot be used in motorcycle applications.
Keep the master cylinder from being completely drained while bleeding the system. Air bubbles will be able to enter the system if you do this.
In brake systems with linked front and rear brakes or systems with multiple calipers, begin with the caliper that is furthest from the master cylinder. Consult your owner’s manual if you’re unsure.
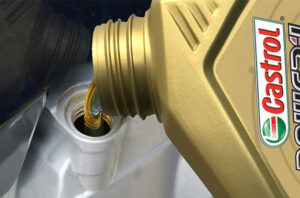
Use brand-new, unopened brake fluid. Even fluid that has been opened and kept in a closed container will eventually wick up moisture and deteriorate.
Which Brake Fluid Type Should You Use?
DOT 3, DOT 4, DOT 5, DOT 5.1? Which one should you choose? Their boiling points are what distinguish these brake fluids from one another. It’s important to minimize the chance of boiling the brake fluid because motorcycle brakes operate at high temperatures.
Riders who expect their motorcycles to perform well will typically use brake fluid with a higher boiling point. People who compete or push themselves during a track day will use their brakes heavily, creating more heat. The high boiling point does not, however, have as much of an impact on a regular or conservative street rider.
Some safety measures to take are:
- Use DOT 2 brake fluid in your motorcycle instead. The boiling point is too low, which could cause brake failure.
- Never mix DOT 5 with ANY other brake fluid. It is silicone-based, whereas all other brake fluids are glycol-based.
- According to the waste and disposal laws in your town or county, dispose of used brake fluid properly. Don’t throw it on the ground or down the drain. That is just disgusting.
Why Should You Flush The Brake Fluid?
The lifespan of brake fluid is finite. It gradually starts to deteriorate with repeated heating and cooling, and because glycol-based brake fluids are hygroscopic, they absorb water. If the brake fluid’s water content rises to an excessive level, it may become less effective or damage your brakes, costing you money to repair.
Although less frequent, air can occasionally enter the brake lines due to a leaky seal, hose clamp, or improperly fastening the reservoir lid. Flushing the brake fluid is the best way to get rid of the air, which will result in mushy and ineffective braking. Make sure to fix or swap out any components that could have started the leak in the first place.
Last but not least, if the reservoir covers are removed without taking proper precautions to keep the work area free of dust and debris, the brake fluid could become contaminated or dirty.
How Can Brake Fluid Levels Be Checked?
Two brake fluid reservoirs, one for the front brakes and one for the rear, are standard on all motorcycles. Because it frequently rests on top of the handlebars next to the front brake lever, the front reservoir is the simplest to locate.
What motorcycle you own will determine where the rear brake reservoir is. They could be hidden behind body panels or the rear brake pedals, but they are frequently found close to the rear brake and ought to be easy to see without taking anything apart.
The reservoirs can be square or round; some have an opaque wall so you can quickly see the fluid level; others have a tiny round window to check the level. Two indicator lines on the reservoir’s exterior will be included with each one. Always keep your fluid level between those lines. Never go over the top line or below the bottom line.
What Might Go Wrong When Bleeding Your Brakes?
Anti Lock Braking, or ABS, is a common component of brake systems on motorcycles today. With these delicate, computer-driven systems, it is simply not worth playing around with. Making a mistake could result in you having to trailer your bike to a professional mechanic who can fix it.
Let’s take a very broad look at how conventional systems operate and how you could change your brake fluid, should you choose to, because it’s important to understand the procedure. First, however, a word of caution:
It is very corrosive to use brake fluid. It consumes paint and metal finishes. Quick, and watch out for spills. Keep a water hose nearby as well as a lot of rags. Even if you don’t think you’ve spilled any, it’s best practice to wash down the area where you’ve been working with clean water after you’re done, just in case.
Where Can I Dispose Of Used Brake Fluid?
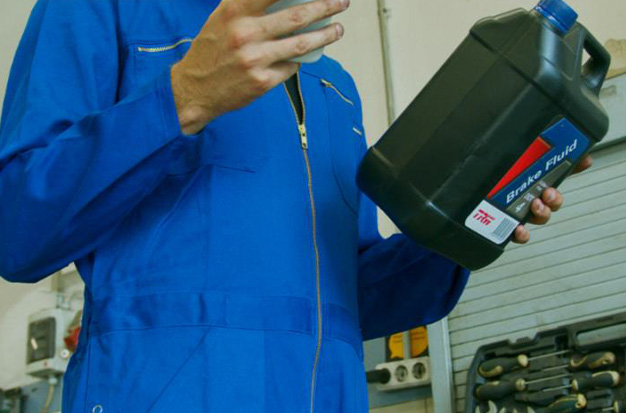
Because it is highly corrosive and flammable, brake fluid should be disposed of carefully. The majority of waste management companies let you recycle used motor oil and brake fluid together. Therefore, most locations that accept used oil should also accept used brake fluid. Used brake fluid may be recycled in some auto parts stores.