Even the best tires will eventually deteriorate with prolonged use. It’s best to change your tires as soon as possible when they begin to wear out because worn-out tires make it harder for your car to stop, which increases the likelihood of an accident. It’s time to change the tire when the tread reaches the wear mark indicators on the tire.
In the normal course of events, you would need to bring your car to a tire shop to have the tire removed. You can save a ton of money by fixing your own tires instead of paying for expensive repairs that could be used for other car-related maintenance. Learn how to quickly remove the tire from the rim by reading this article.
When Should You Change Tire Rims?
While some signs of rim wear, such as scratches and dents, are obvious, others may not be. These are some telltale signs:
- The ride is clunky, like driving with a flat tire
- Have a lower fuel economy than usual
- When driving, your seat (or the entire car) vibrates
- The breaks aren’t working as well
- You’re constantly having to inflate the tires
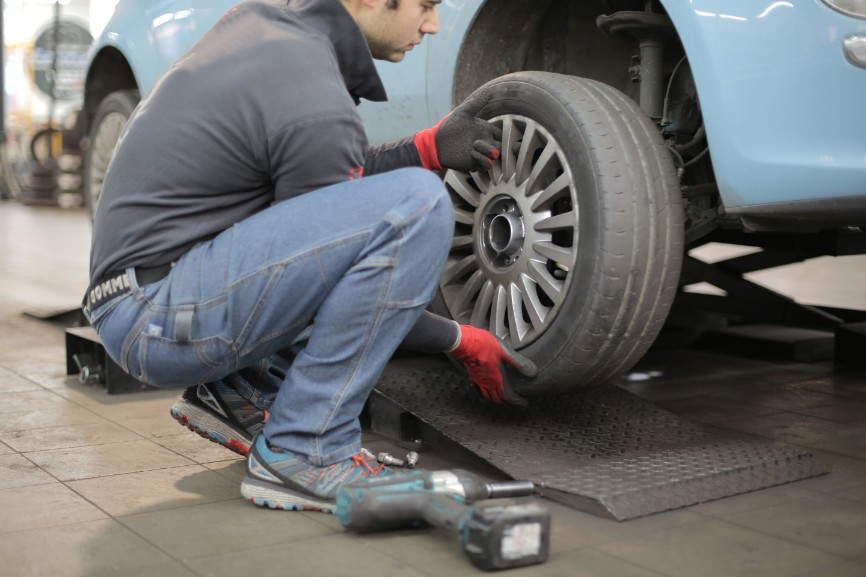
Removing The Tire From Rim By Hand
Remove The Valve Core/air Cap To Deflate The Tire
Find the air valve, a tiny rubber or metallic device, by setting the tire on the ground or another flat surface. You must remove the valve’s cap (by twisting counterclockwise) in order to see the valve core inside. The core is a metal cylinder in the valve that inflates the tire tube and releases air when it is removed.
You will need to use a core removal tool to remove the core from the valve. You insert the tool’s end into the valve and then twist it once more counterclockwise to release the air. It resembles a small screwdriver. The equipment is affordable and accessible online and at auto supply stores.
Detach The Tire’s Bead From The Rim
The tire’s edge that is fastened to the rim is known as the bead. The bead stays firmly attached to the rim when the tire’s air pressure is adequate. Because of this, you can forcefully separate the tire’s bead from the wheel while deflating the tire.
After deflating the tire, there are several ways to remove the bead. One of these techniques is:
- The tire should be driven over.
- The tire-mounted vehicle is raised and lowered.
- Cut through the bead.
- Use a bead breaker.
Drive A Car Over The Tire
Unscrewing the bead from the rim using this technique is probably one of the simplest methods available. Drive over the tire after you have placed it on the ground. Thus, the edge is pushed out of the groove and downward.
Before the bead breaks, you might occasionally need to repeat the process several times. However, be careful to only drive on the rubber and avoid using the metal, which could harm the rim.
Lift And Lower The Vehicle On The Tire
Lowering a vehicle over the tire is another relatively simple way to break the bead. By using a jack to raise the car, a portion of the tire is then pushed underneath the car. The tire’s edge is pushed out of its groove as the car is lowered, resting on the rubber next to the metal wheel.
If you are unfamiliar with how to jack a car, do not attempt this method because there are some technical aspects to it.
Cut Through The Bead
A sharp knife can also be used to cut through particularly tough beads. Cutting through, however, will harm the tire in a way that is largely irreversible.
Lay the tire flat on the ground and use a saw to cut along the section closest to the edge, being careful not to veer toward the metal wheel in order to protect it from damage.
Use A Bead Breaker
A tire bead breaker, as its name suggests, is a tool used to separate the tire from the wheel. The tool is the simplest way to remove the bead without harming the rim.
Apply Lubricant To The Edge Of The Rim
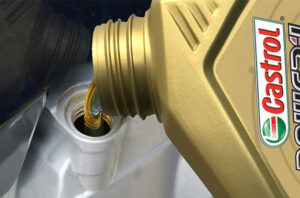
Apply liberal amounts of any lubricant on hand, such as oil or dish soap, around the edges of the tire and rim. Make sure the lubricant gets under the rim as well. It is easier to pull the tire out over the edge of the rim when it is lubricated.
Raise The Tire Over The Edge Of The Rim Using A Pry Bar And Screwdriver
Use your feet to press down on the rubber to make an opening after lubricating the tire and wheel edge. Lift the tire up and over the rim’s edge after carefully inserting the pry bar into the resulting opening.
Use the flat-head screwdriver to pull out the edge around the entire circumference of the wheel while holding the pry bar firmly in place. The best tools for this job are screwdrivers and flatter pry bars.
Pry Out The Bead On The Other Side Of The Tire
The same procedure must be followed on the opposite side after the bead has been successfully extracted. Start by liberally lubricating the bead and rim edge, making sure to get underneath the rim this time.
To lift the tire over the edge of the rim, press down on the tire as you did before and insert a pry bar into the gap. To remove the tire from all sections, use the screwdriver once more. You should now be able to easily lift the wheel away from the tire as it should be completely free of the wheel.
Removing The Tire From Rim Using A Manual Tire Changing Machine
Set Up The Plywood Base
The platform that the machine sits on should be strong enough. To begin, put the machine on top of your plywood and trace the machine’s base with a marker. Make a mark on the holes so you’ll know where to put the bolt.
Since it is stronger and more stable, some people choose a concrete block as a base; if you do, the fastening process will be the same.
Secure The Machine To The Platform
Place the machine on top of the traced base and adjust the bolts as needed. Turn the bolts completely tight and bite into the wood using your screwdriver in a clockwise direction.
Deflate The Tire
This process is the same as if you were manually removing the rim—locate the core valve and twist the cap counterclockwise until it detaches. To remove the valve stem, insert the core valve removal tool into the valve and turn counterclockwise.
Clamp The Tire Onto The Machine
The machine’s nub, a tiny triangle on the base, can be located. The wheel should be laid flat and rim side up in this position. Hook the tire changer arm on top of the rubber once the wheel is resting on the nub and clamp it in place to secure it.
MORE: How to check and add air to car tires
Separate The Tire Bead From The Rim
Your tire changing machine should include a changing rod, but any basic metal rod with a pointed end will suffice.
The rod should first be inserted into the rim-tire joint using its pointed end. To gradually reveal the rim, press down on the wedge with your hand or foot.
Flip The Wheel And Repeat Steps 4 And 5
The back of the rim is still an issue even though it is exposed on the opposite half lip. Turn your wheel on its opposite side and, after placing it on the nub, clamp it to the machine. Like before, press the metal rod-equipped arm to reveal the wedge’s rim.
Place The Tire On The Machine’s Metal Disc
The top of the machine is where you’ll find this metal disc-shaped object. The tire can be set up by carrying out the following:
- Affix the tire to the wide spoke. The main spoke, also known as the central spoke, supports the machine arms. Make sure the tire enters the lug nut and the smaller spoke as you slide the metal rim. Use a rug, piece of cloth, or even a piece of paper to cover the spoke to prevent rim scratches.
- The bracket component should be slid into the middle spoke. When you pull the bead up later, the bracket, a metal object, prevents the tire from rotating or tilting.
- Attach the top cap. The cylinder of the main spoke is covered by the cap. If you need to tighten it, even more, use the machine’s separate rod or turn it clockwise to keep it in place.
Pour Lubricant Around The Rim
This will make it simpler to later pry the rim of the bead. To get under the rim, raise it just a little bit. Make sure the area there is also lubricated. Apply lubrication liberally as necessary.
Pry The Tire Over The Rim
Place the duck-head end of the tire-changing rod around the tire’s perimeter. Holding the rod, raise the bottom bead of the tire. Slide the rod clockwise as you work your way around the other angles until both sides are sufficiently loose to allow the bead to pop off.
If you can’t capture a specific section in a single frame, that’s okay. By pushing up on the foot pedal and rotating the rod in the opposite direction, you can go back.
Remove The Rim’s Entire Tread
To fully raise the tire, move the rod all the way down to the bottom of the wheel. The tire should then come completely free of the rim at that point!
Conclusion
The full instructions on removing a tire from a rim, both manually and with the aid of a machine, are provided in this paragraph.
Now, you have the option of manually changing tires or using a machine that does it for you. Hand removal is laborious and necessitates the use of pry bars, screwdrivers, lubricants, and a core removal tool. When using the changing machine to remove the tire, the same set of tools will be required.
Read More: